Posts

Showing posts from September, 2013

How to automatically change the Outlook 2010 Microsoft Exchange Proxy Setting

Image
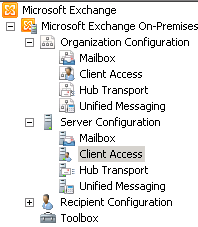
How to automatically change the Outlook Microsoft Exchange Proxy Setting for all Outlook users at a certain site. Our company has decided to change the OWA default web site name. The original name, as an example, was owa.DomainName.com. The new name will be owa-us.DomainName.com. As we are adding many sites around the world we needed to differentiate between the various countries. Additionally we also implemented a certificate change to a wildcard, *.DomainName.com. I did not want to affect any other servers around the world just our US location servers. Here is how I accomplished the configuration change. #1 - Open the Exchange management Console (EMC) #2 - Navigate to "Server Configuration" #3 - Click on "Client Access." #4 - Click on the server you want to change. #5 - Double click on the server or right click then select Properties or click Properties in the right side Action Pane. #6 - Select the "Outlook Anywhere" tab. #7 - Modif

Netflix on the PS3 aip-701 error...

Image
Netflix on PS3 AIP-701 Error - FIXED!!! Sometime ago Netflix made changes to the way you access their movies/shows. This change caused my Netflix account on the PS3 to load 25% of the movie/show then give me an AIP-701 error. I tried many ways to fix this problem. I reinstalled Netflix. I reset the Netflix account with the PS3 controller using the Start & Select hold buttons while starting the Netflix application. Nothing worked until I used these steps. You need to remove any saved Netflix data. Netflix retains data just like any PS3 game does. The stored data seems to contain old DNS entries that are now incorrect for the new Netflix application. STEPS TO FIX THE AIP-701 ERROR #1 - Delete the Netflix application. #2 - Delete Netflix stored data folder. #3 - Reinstall the Netflix application #4 - Start Netflix and login.  Follow the steps below to repair your Netflix. 1.     From the XMB home menu, go to  (TV/Video Services). 2.     Navigate to the Netflix

Lync 2010 - Suppress Caller ID...

Image
Lync 2010 - I am so suppressed! In the Lync 2010 environment users making external calls will have their caller id's exposed to the person they are calling. There may be a situation where your users do not want to have their phone numbers viewable so they can not be called directly. In such a case you can Suppress the Caller ID. #1 - Open the Lync 2010 Server Control Panel and navigate to Voice Routing. Then click the Route tab. #2 - Half way down the page you will see "Suppress caller ID".  #3 - Click on the check box to initiate. You then must give a "Alternate caller ID". #4 - Click "OK", Click "Commit" >>> "Commit All" then "OK" You users caller id will now be shown as the "Caller Alternative ID". This could be a phone number that represents the main company number or the Subscriber Access number.

Exchange 2010 – Exmerge has been Exmerged!

Image
Exchange 2010 – Exmerge has been Exmerged! In previous versions of Exchange exmerge was the tool used to move or fix emailboxs. Unfortunately in Exchange 2010 SP1 exmerge has been replaced by the “New-MailboxExportRequest” command. However there are a few prerequisites that need to be completed before you can run the export. Make sure you have a share you have proper access to or create one:   I just directed the export it to my share where I do my Exchange backups so I knew I had the correct permissions.   #1 - New-ManagementRoleAssignment –Role “Mailbox Import Export” –User “adm_polaski” You need to give yourself rights to Import/Export mailboxes. This is not given to admins by default. You must assign the rights. #2 - New-MailboxExportRequest -Mailbox Kumaran -FilePath "\\usn002\exchbackup\Kumaran_Recovered.pst" You should receive the input that the MailboxExport is queued.   #3 - Get-MailboxExportRequest | Get-MailboxExport